Setting Up VS Code Server (Self-Paced)
This guide will help you access your VS Code server environment when running the workshop independently.
Prerequisites
- AWS Account with administrative access
- Successfully deployed vscode-server CloudFormation stack
- Modern web browser (Chrome, Firefox, or Edge recommended)
Accessing Your VS Code Environment
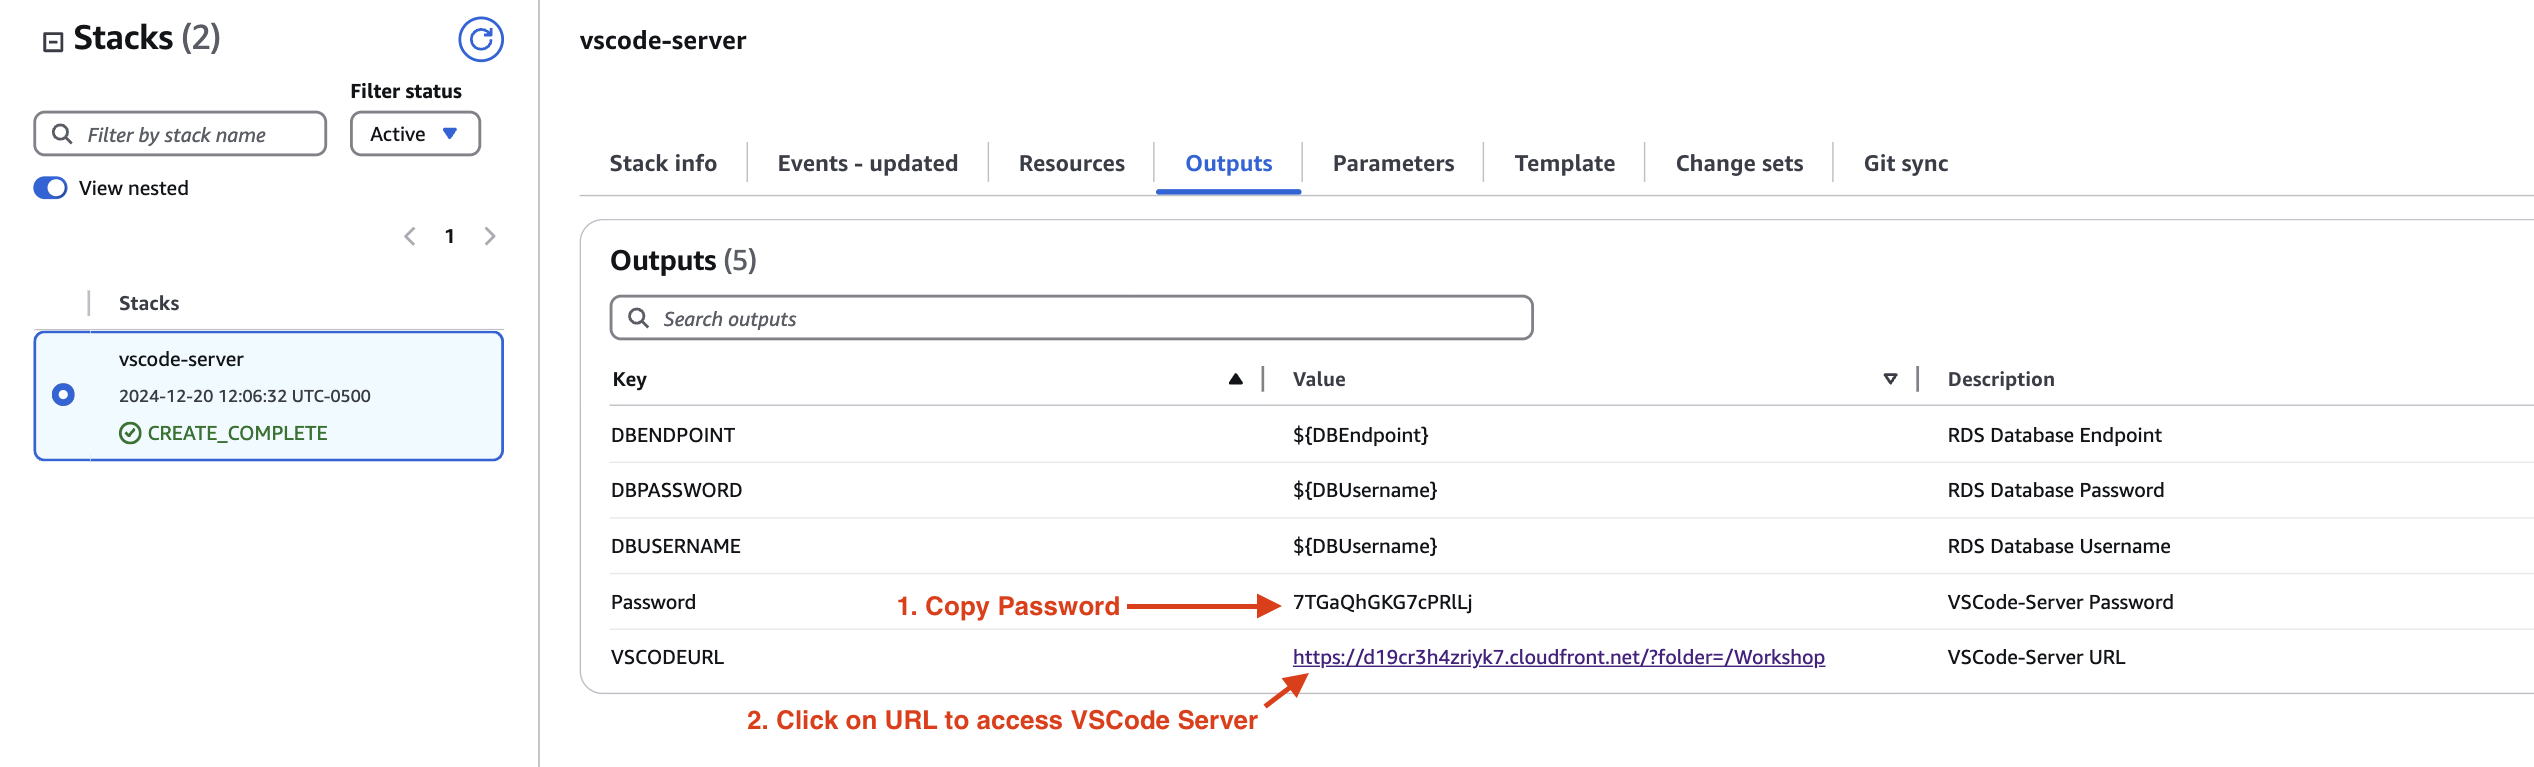
Step 1: Locate CloudFormation Outputs
- Open the AWS Management Console
- Navigate to CloudFormation service
- Select your
vscode-serverstack - Click the Outputs tab
- Locate two key pieces of information:
- VSCODEURL: Your VS Code server endpoint
- Password: Your authentication credentials
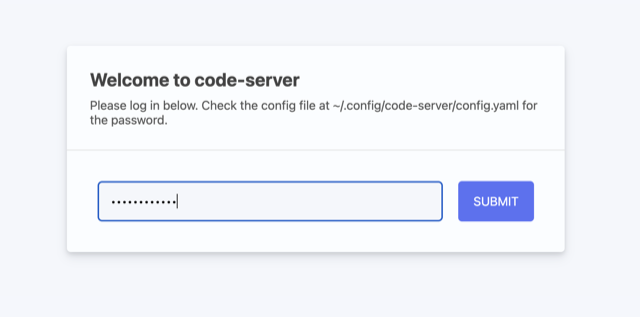
Step 2: Configure Access
- Copy the Password from CloudFormation Outputs
- Click the VSCODEURL value to open VS Code in a new tab
- When prompted, paste your password
- Select Login to access your environment
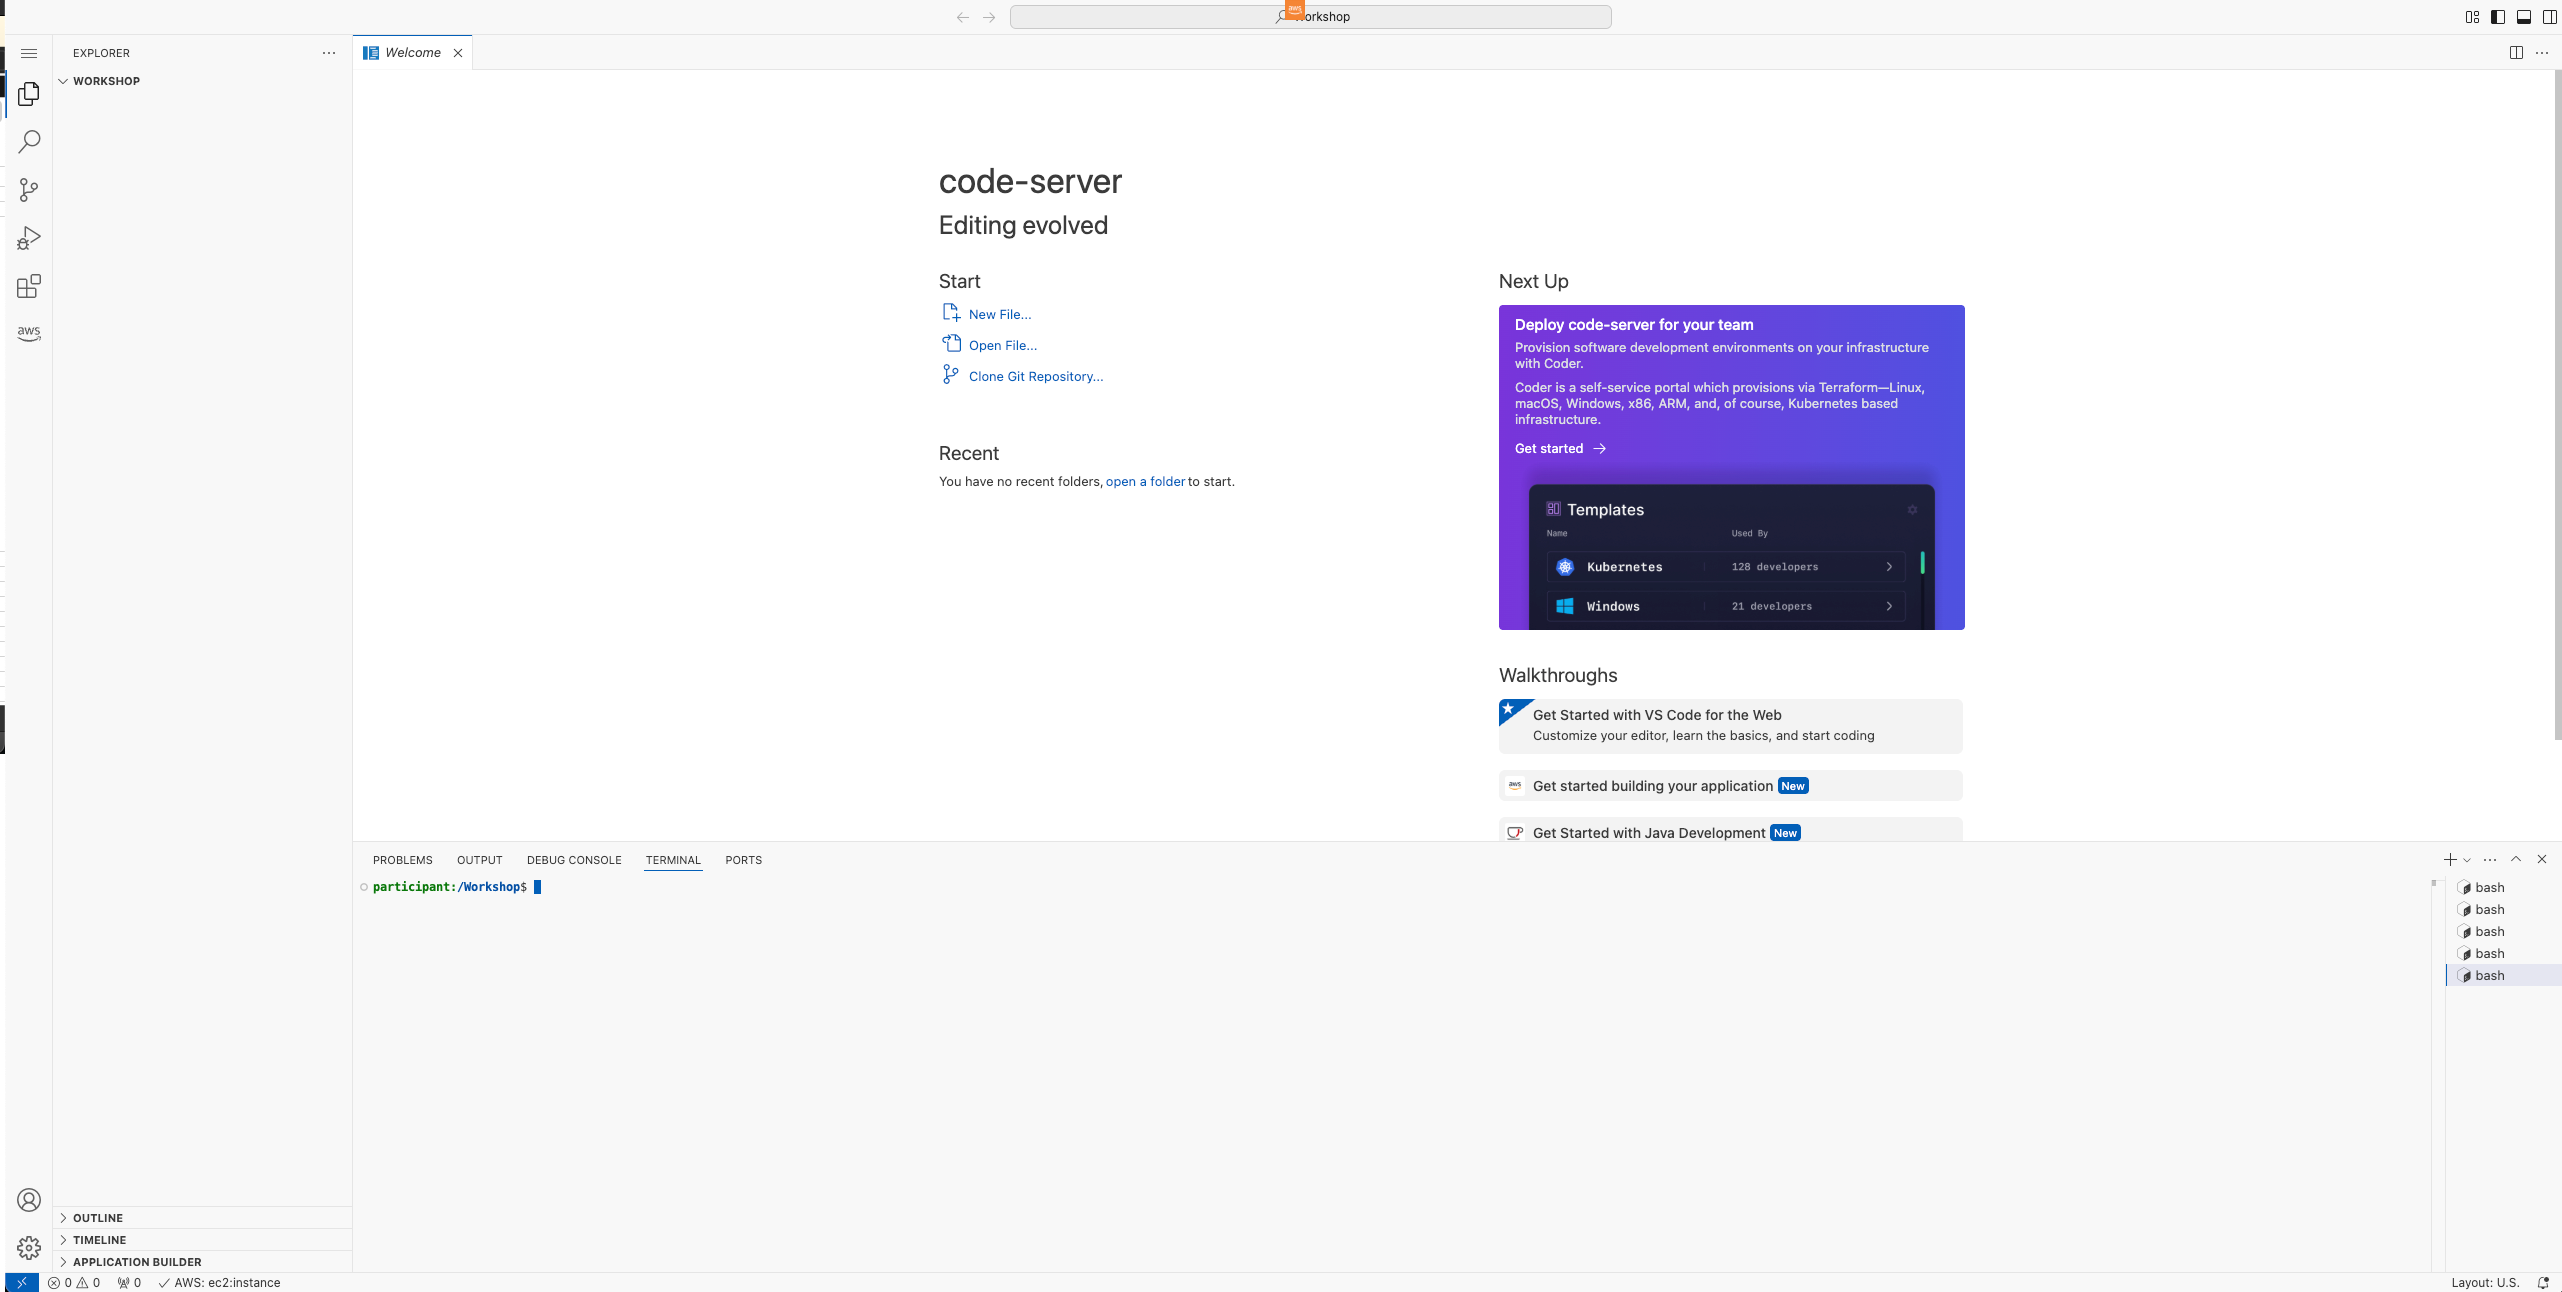
Step 3: Verify Your Environment
After logging in, confirm:
- File explorer is visible on the left
- Editor area is accessible in the center
- Terminal can be opened (
Ctrl + `) - Git integration is working
- AWS credentials are configured properly
Security Considerations
- Your VS Code server is protected by CloudFront
- Access is limited to your IP address
- Session cookies are encrypted
- All traffic is SSL/TLS encrypted
- Environment is isolated in your AWS account
Troubleshooting Guide
Common Issues and Solutions
-
Cannot Access URL
- Verify CloudFormation stack deployed successfully
- Check if CloudFront distribution is deployed
- Ensure your IP is allowed in security groups
-
Authentication Failed
- Double-check password from CloudFormation outputs
- Clear browser cache and cookies
- Try incognito/private browsing mode
-
Performance Issues
- Check your internet connection
- Verify instance type matches requirements
- Monitor EC2 resource utilization
-
AWS Credential Issues
- Verify IAM roles are properly configured
- Check AWS CLI configuration
- Ensure temporary credentials haven’t expired
Next Steps
✅ Verify you can access the VS Code server
✅ Test the terminal functionality
✅ Proceed to “Create a Docker Account” (skip if you already have one)
✅ Continue to the CI/CD overview section
Additional Resources
Cost Considerations
- EC2 instance running costs
- CloudFront distribution charges
- Data transfer fees
- Storage costs for EBS volumes
Getting Help
If you encounter issues:
- Check the troubleshooting guide above
- Review CloudWatch logs
- Consult AWS documentation
- Reach out to AWS Support if needed